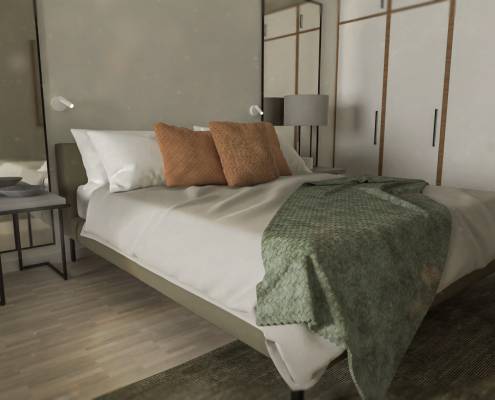
Customer Spotlight: First Experiences using the Rendering Software FluidRay ‐ A Designer’s Perspective.
By Mark Anders, Anders Design LLP
Introduction
I am a design creative, based in a small town on the South Coast of England. I regularly learn new tools and techniques to create opportunity, secure new work and turn my hand to whatever presents itself along the way. This takes time, so where possible I try to add things which complement my existing workflows and that will continue to be of use in the future.
The Problem
Back at the start of 2020, I was commissioned to create a brand and associated assets for Deheers Warehouse, a sensitive conversion of a beautiful 18th century commercial building into luxury harbourside apartments.
At the point I came into the project, construction was already underway and there was an increasing need to create content for attracting potential buyers. There was plenty of historical information from which inspiration could be taken for written copy but little in the way of visual content, aside from a handful of Architects’ concept images. All historical photos were subject to copyright, the owners of which were impossible to locate or not forthcoming with consent. The build was not sufficiently far along to take photos of the apartments so any visual solution would have to be created virtually. I needed to find a way of producing interior visuals to a level befitting the quality of the development with neither the time nor budget to employ a specialist CGI studio. The only logical solution was to work out a way to produce the visuals myself, despite having no idea of how.
I work with pen and paper, AutoCAD, Rhino 3d, Adobe Suite and have played with rendering software such as Vray, Flamingo and Keyshot. Whilst I had previously used these software solutions to produce decent product visuals, interior visuals had always eluded me. I know from talking to my peers, that I am not alone when it comes to interior rendering. Client perception generally is that photo‐realistic CGI interiors require no effort at all and provided a 3d model exists, created at the click of a button. The reality for most small design teams is that such images are unachievable in-house and unaffordable externally. Even if someone within a business were equipped with the skills and hardware, using existing render software would require as much time to set up and render a scene as was spent modelling it. When presented with the expensive reality, most clients cannot justify the cost.
Such images have quite simply been out of reach, certainly to me. Instead, I have always opted for rather more lo‐fi alternatives such as mood boards, collages, perspective hand sketches, 2d colour elevations and various Photoshop actions to convey just enough information for a client to sign‐off.
The Deheers project however, demanded a far higher level of interior visual than I had previously created. I could have proposed perspective marker renderings had the project not been at a point on the timeline where there was still potential for significant design elements to change. Any viable solution would need to be digital, compatible with my existing workflows and capable of allowing for retrospective design changes. Pretty much the antithesis of a marker rendering. My gut told me there would be something I could use so, hoping for the best, I opened Google and started searching.
I was surprised by just how few options there were. There was no shortage of software offering the promise of ‘high end professional images at the touch of a button’ but, once you read through their literature, very few that I could be confident of using to achieve the level of image I needed.
The large proportion of software I came across could be placed into one of four categories:
- Too expensive. These days most are subscription based, requiring a minimum 12‐month commitment or a monthly rolling subscription. Most came in at around £40 per month which is almost as much as I pay from the entire Adobe Creative Cloud Suite. Some even required a ‘per render’ fee.
- Not compatible. As well as rendering, many of them offered drafting and modelling functionality. In most of these cases the workflow from Rhino would be problematic or impossible altogether, without additional software.
- Low image quality. A lot of the example output images conveyed nowhere near enough of the emotive qualities I was looking for from a final image. Even with significant postprocessing in Photoshop the results would fall short of the mark.
- Overly complicated. These solutions catered more for CGI specialists, communicating in language I was never going to understand and requiring hardware far beyond my computer’s specification to function efficiently. I was in no doubt, given a significant learning curve, that I could produce results with these but were it not for the fact they also fell into the ‘too expensive’ category.
The Solution
FluidRay stood out from the crowd. As well as claiming compatibility with Rhino, its website content was easy to understand and message simple; ‘fast, easy, high‐quality’. My laptops met all the minimum system requirements and there was a free 10‐day trial with no need to provide any payment information. The pay‐as‐you go subscription model worked for me as did the low monthly amount. Most importantly of all, the gallery images looked to be of an acceptable quality, even once considering the possibility they could have been post‐processed. There was enough there to warrant downloading the trial and having a play.
Before getting into FluidRay I spent about 30 minutes modelling a basic interior scene in Rhino, making sure to include some architectural elements that would feature in the Deheers’ interiors.
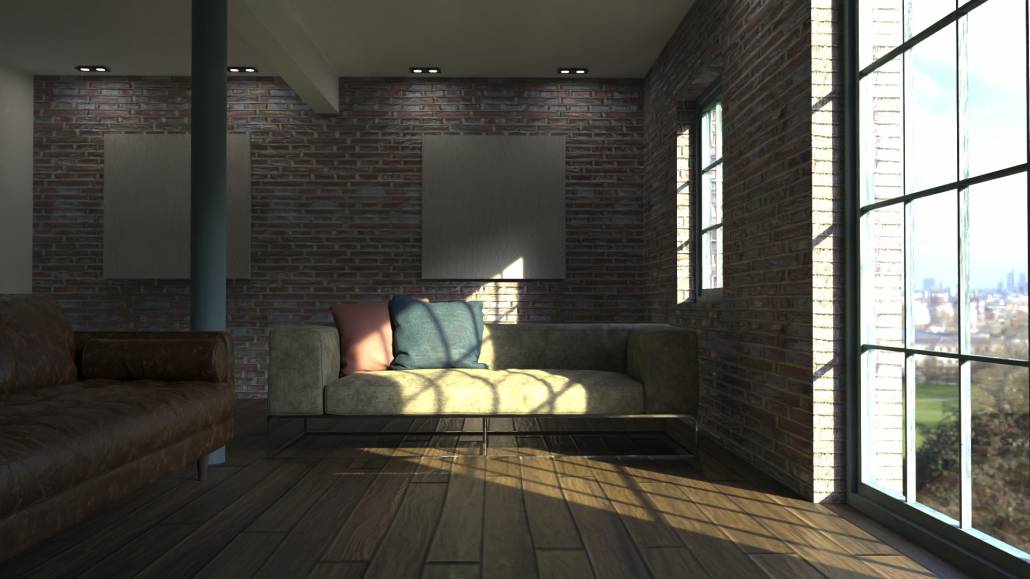
It took 15 minutes to assign materials, artificial lighting and hdri environment in FluidRay, and a further 1 hour and 52 mins to render a scene 1920 x 1080 pixels at ‘high (1024 spp)’ render quality.
I was pleasantly surprised by how quickly I was able to produce an image with qualities far beyond what I had ever rendered before. I found FluidRay to be more intuitive than technical, which was a breath of fresh air compared to my previous experiences with other rendering software. All the toolbars and libraries were simply laid out with comprehensible hover‐over tooltips. As with all new software, I knew that FluidRay would not be without its frustrations and have a character and workflow that would only be discovered and understood with use, overtime. I had however, discovered enough from my exploratory session to be confident it was the right software for the job.
The Project
The Deheers project comprised of one three‐bedroom penthouse and four smaller two‐bedroom apartments. The smaller apartments were handed and in pairs, over two floors, with apartments 1 and 3, 2 and 4 sharing a footprint respectively. The architect’s finishes specification was standardised across all five apartments with each sharing the same floor and wall finishes, door fittings and light fixtures throughout. The client required 5 interior visuals per apartment, so I would need to produce 25 visuals in total.
During the brand development process, each apartment inherited the name of a previous occupier of the building with a personality to match. To make the visuals more interesting, I decided to furnish each apartment to suit its personality. This would greatly increase the modelling time in Rhino, but I hoped the results would be worth it. At the very least it would stop all the visuals looking the same.
The Process
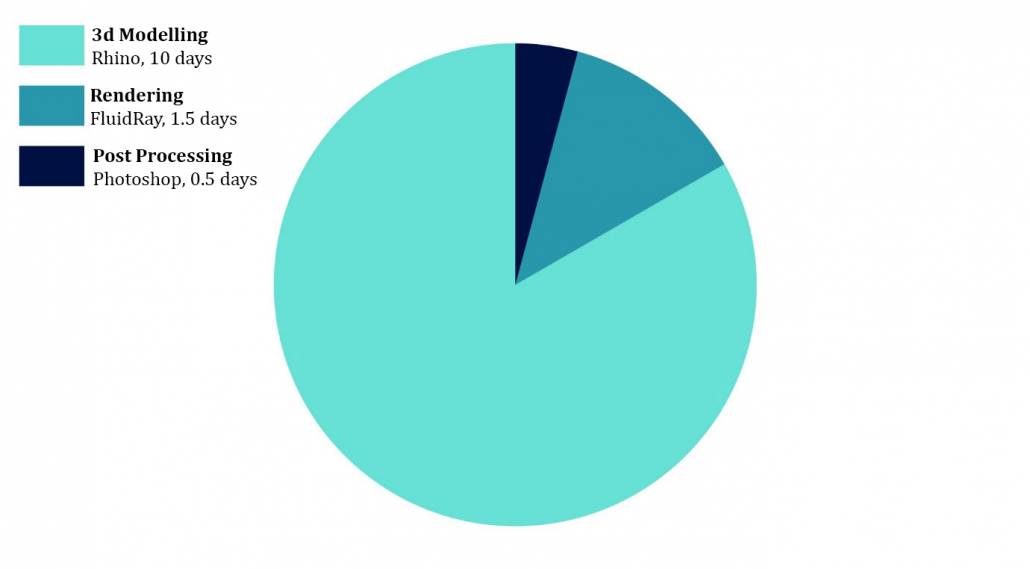
At this point, it is probably worth mentioning a little bit about my workflow. For this project, I modelled in Rhino, rendered in FluidRay and post‐processed in Photoshop. Here is a chart showing how I split my time between the three pieces of software, based on a single apartment scene:
Modelling
As the chart shows, most my time was spent modelling in Rhino. The more detail I modelled the better the results, but this did make for larger file sizes and longer save times. The majority of my 3dm files for the Deheers project were between 150mb and 250mb in size.
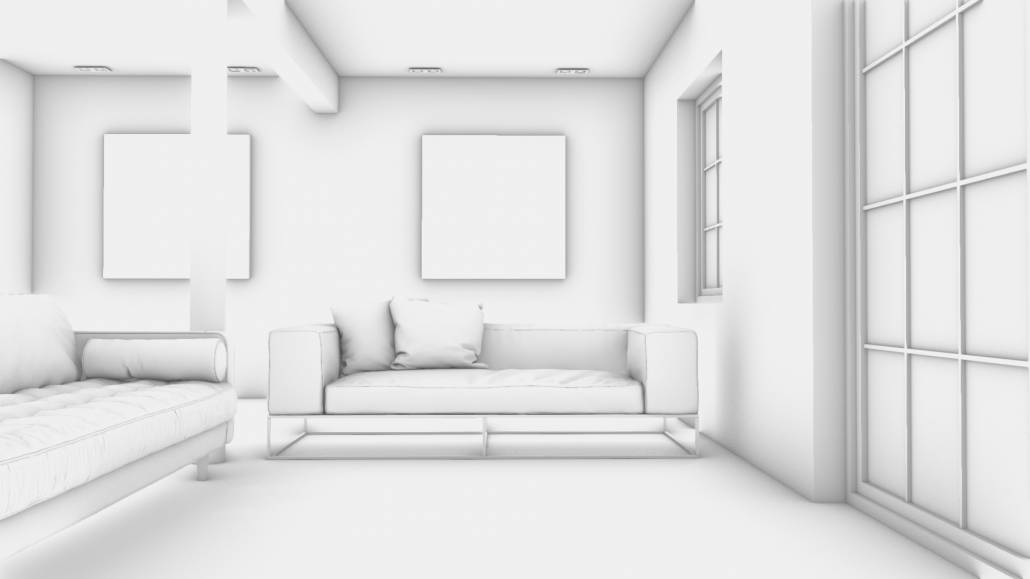
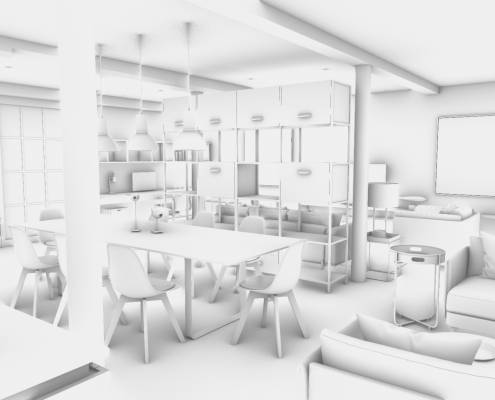
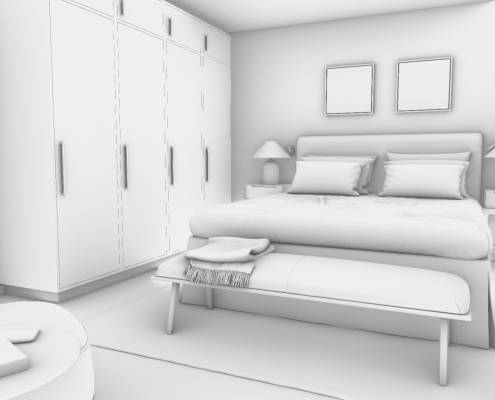
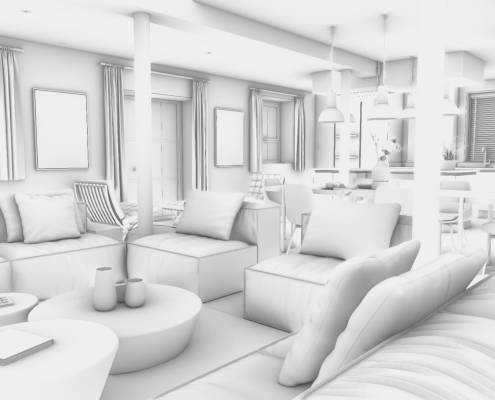
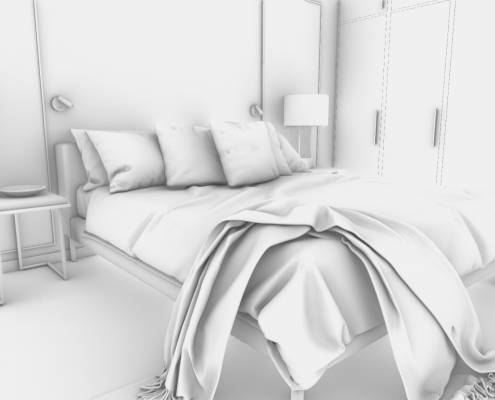
I did a lot of the scene setup in Rhino to minimise further setup time in FluidRay, such as collecting any objects sharing a material into one layer and saving any views I planned to render as ‘named views’. I also purged my models before importing into FluidRay, removing any inherited attributes, groups, textures, blocks and curves in order to mitigate risk and avoid future issues during the render process. Here are some of my Rhino models from the Deheers project, set as named views.
Rendering
Compared to setup in Rhino, rendering in FluidRay was straight forward. Import was easy with FluidRay automatically set to inherit several attributes from the .3dm file I was importing. For example, any layers I created in Rhino were auto-loaded into FluidRay’s selection manager as saved selections, which I could then use to assign materials. Saved named views from Rhino also imported into FluidRay’s camera settings. Because of the large file sizes involved, I tended to import multiple named views using them to navigate around my model rather than rotating and zooming manually. Having multiple saved views within one FluidRay file also allowed me to save on setup time as I could produce multiple render views from one initial render setup.
FluidRay also had a smart reimport function. At any point during the process, I could go back to the original Rhino file, make changes, add or alter an object and reimport back into FluidRay without losing any of the render setup I have already undertaken in FluidRay. This was especially useful when the client made tweaks, or the specification changed.
It’s also worth mentioning that FluidRay is a real time renderer, meaning you can see the effect of any settings changes on your composition and the objects within as you make them. Knowing where my render was heading, before it had completed, saved time and greatly reduced instances of re-rendering. For greater efficiency, I did all my setup at a lower resolution only moving to higher resolution and quality when I was ready to start my final renders.
All images for the Deheers project were rendered at 1920 x 1080 (Full HD) resolution and High (1024 spp) quality. Render time was generally between 1hr45mins and 2hrs. Not at all bad, given the relatively low spec of my laptops.
Hardware Specification
Dell G7 15”
Windows 10 ‐ 64bit
2.6 GHz i7 Processor
8 GB RAM
256 GB SSD, 1 TB HDD
Nvidia GeForce GTX 1650
HP Envy 17”
Windows 10 – 64bit
2.5 GHz i7 Processor
12 GB RAM
1 TB SSD, 1 TB HDD
Nvidia GeForce 940M
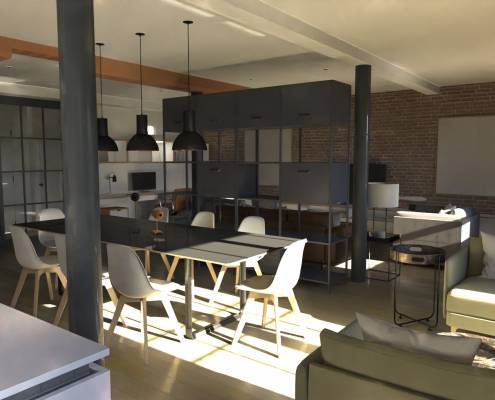
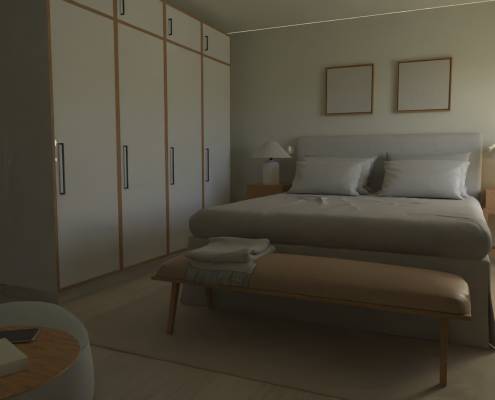
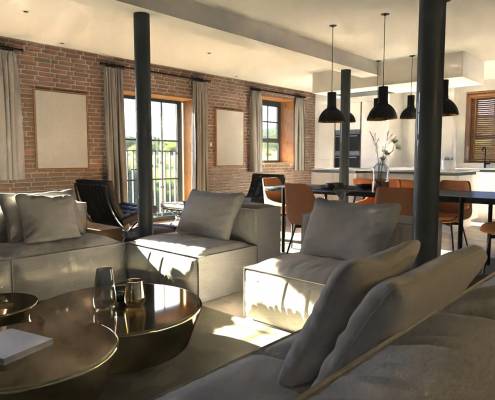
Here are the same four previous views after they were rendered in FluidRay.
Post-processing
I decided early on, during my evaluation process in fact, that I would post‐process all of my Deheers images in Photoshop. I have no doubt, given time, that I could become proficient enough in FluidRay to produce final compositions without the need for post. The timescales for this project dictated that I needed to take the path of least resistance. As it would happen, the post work ended up being minimal only taking about an hour per image. I generally rendered about 4 views per apartment scene, all of which I had batched processed within 4‐5 hours including:
- Adding artwork to blank canvases
- Adding patterns to cushions
- Adding images to TV and PC screens
- Adding external scenes to windows
- Auto‐editing light, colour and contrast settings in the ‘Camera Raw Filter’
- Adding emotive elements including light rays and dust speckles
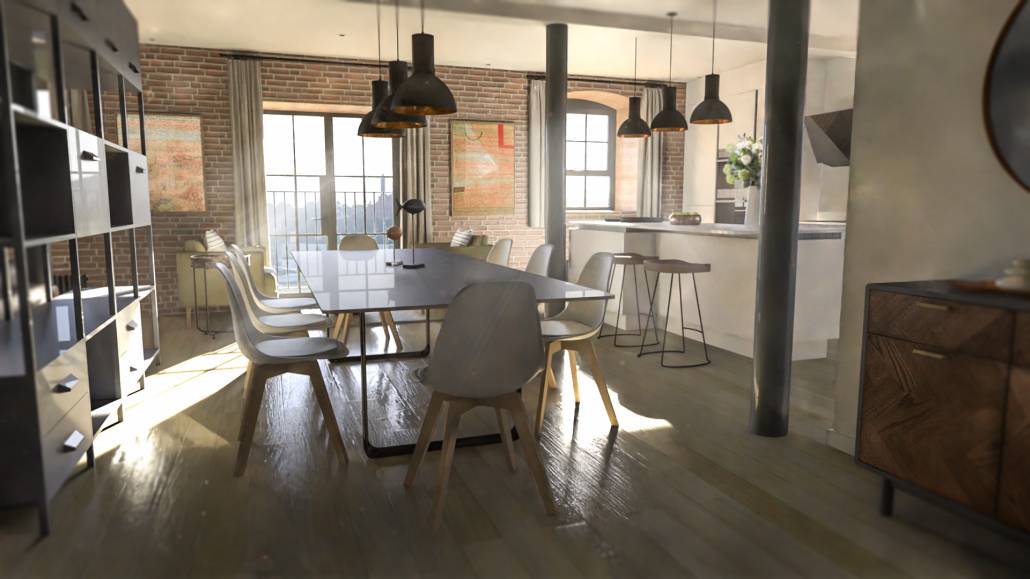
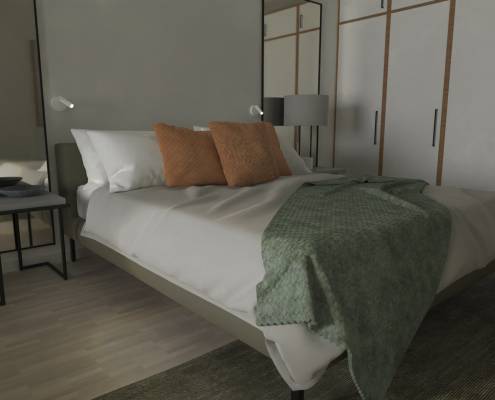
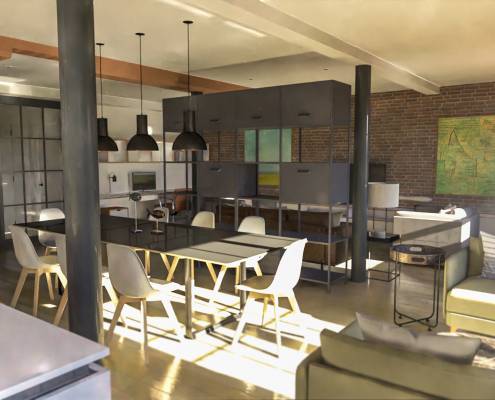
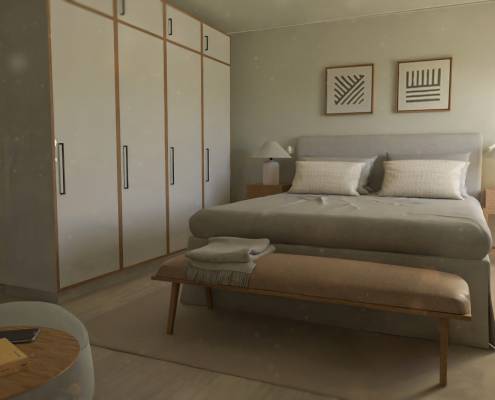
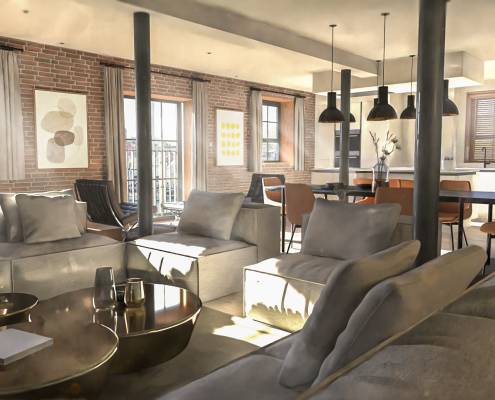
Here are the final 4 images following post‐processing in Photoshop.
Conclusion
I think the final images speak for themselves. My client was happy with the results and the visuals helped to sell all 5 of the apartments in record time. When I originally set out to find a solution, I never expected to find something that would make so much sense of a previously dreaded process and, well, enjoyable! I have only had time to explore the tip of the FluidRay iceberg so far but look forward to using it more and more, not only for my interior work but also exteriors and products too. Furthermore, it will enable me to confidently explore the option of offering my render services to other design companies in the future.
I believe that anyone with basic 3d modelling knowledge could use FluidRay, regardless of previous rendering experience, to produce results that convey the look and feel of a space to a level way above those they could ordinarily produce using other solutions. FluidRay provides a practicable means to visually communicate to an audience what it will feel like to interact with whatever it is you, the designer, proposes to create for them. Ultimately this is what is most important.
Well done to everyone at FluidRay and thank you!

